


Electrical system
December 2008. New Bedford, USA. Old electrical system - must be re-done!
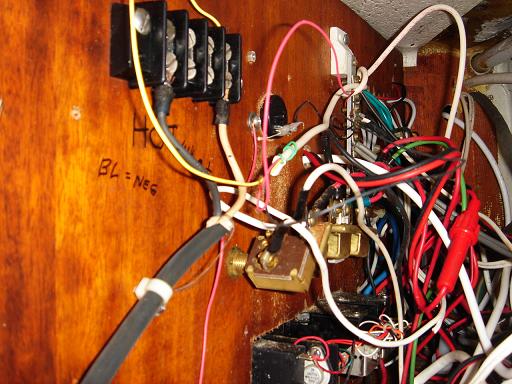
As you may see from the picture, it's the project of its own. The boat should be rewired.
April 2009. New Bedford, USA. New electrical system - to the book!
The first impression of rewiring to the standard - it is expensive! Very expensive!
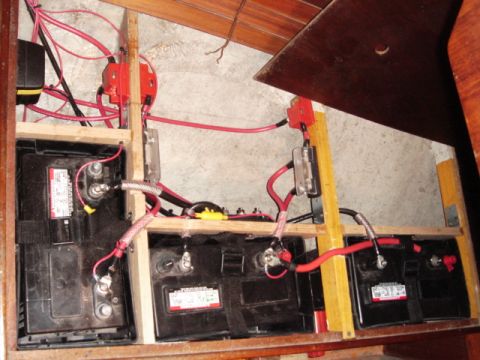
I began with relocating batteries from a cockpit portside locker to underneath a quarter berth. Originally there had been just two batteries: one for starting an engine and another for serving as a house battery. I decided to double the house side capacity and add one more deep cycle battery.
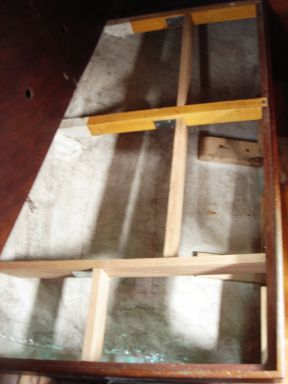
Moving is usually a hassle. Moving batteries had not been an exception. First, I noticed that the glazing fiberglass tape of the berth frame detached in some places and had to be fixed, of course. Second, the battery boxes didn't fit with their covers on. Third, the supporting frame structure must have been built to hold heavy batteries in place during a severe weather and even a potential overkeel. I had to make a trip to the so familiar Home Depot and bought couple of red oak planks and metal brackets. The battery boxes came with straps, so I decided to use them without the covers and drill six more "a la ventilation" holes in the berth plywood for the battery studs allowance.
The new Yanmar engine is fattier than the old Volvo; therefore, I had no room to access the engine components on the port side where a starter and an alternator are located. Hence, to get to the starter, the alternator must be removed. Ah, what a job! I spent half a day for connecting just two wires to the starter. The service manual for a Yanmar engine specifies that only two wires should be attached to an engine from a battery. One should be wired to an alternator's positive stud, another - to negative. The engine has already a cable that goes from an alternator to a starter as part of a standard engine wiring.
I had to play the game of matching terminals to wire and stud sizes. The starter, for example, has 3/8" studs, the original two SeaVolt group 27 batteries have 5/16" negative studs and 3/8" positive ones but the new SeaVolt 90Ah deep cycle battery has both studs 5/16". See the tables for all stud and wire sizes below.
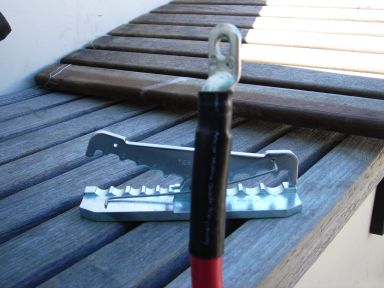
To crimp large gauges I had to purchase a special tool. See the picture to the left with a resulted crimped 1/0 wire finished with a heat-shrinking adhesive tubing.
| Battery Make | Nominal Capacity, A | Discharge Cycles at 0°C | Reserved Capacity at 25A, min | Cranking Amps | Group | Weight, kg |
|---|---|---|---|---|---|---|
| SeaVolt dual purpose | 80 | 200 | 150 | 745 | 27 | 22 |
| SeaVolt deep cycle | 90 | 300 | 175 | 715 | 27 | 24 |
| SeaVolt deep cycle | 90 | 300 | 175 | 715 | 27 | 24 |
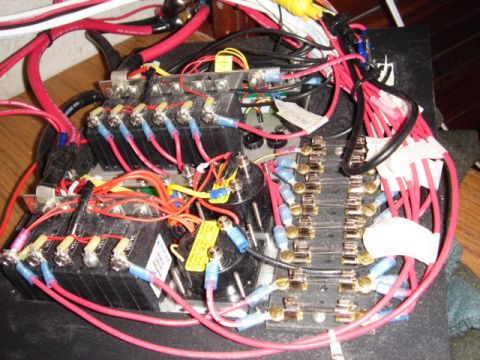
The simplest way of course, would have been to wire the batteries via a three-way switch to an engine but I went the "proper" way. I installed an electronic isolation switch in addition to the regular one. Its purpose was to isolate the house circuit during engine cranking to protect sensitive electronics and to combine a starting battery with a house bank of two during charging. I mounted the manual three-way switch in a difficult to see and access place, to avoid messing with it during a running engine as it would result in an alternator's diodes damage.
I added high amperage fuses between each bank and the starter to avoid a fire upon accidental short-circuiting. I put 300A fuses because the starter takes 250A. I installed two more 80A fuses between each bank and the isolation switch because my alternator is rated at 60A and I used AWG 4 short pieces of wire in between the batteries and the switch. I also fused an electrical panel positive feed (80A between the COM stud of the three-way switch and the panel's 50A 50mV ammeter shunt connected with AWG 4 wire).
| Device | Stud size, inches |
|---|---|
| Starter | 5/16 |
| Batteries, old | 3/8 positive, 5/16 negative |
| Three-way switch | 3/8 |
| 300A fuse block | 5/16 |
| 80A fuse block | #10 |
| Battery Combination/Isolation switch | 3/8 |
| Panel's ammeter shunt | 1/4 |
| Common ground 4-stud bar | 1/4 |
A complement to the stud game was a wire gauge play. Three parameters determine the correct gauge: a ampacity of a wire, a 3% voltage drop and an insulation temperature rating. The better the rating, the higher the current can pass through a wire without burning it. It is especially important for engine spaces where an ambient air can get relatively warm or even hot. The good insulation helps to go with a smaller gauge for a given amperage.
The standards call for a high quality marine wire such as BC5W2, which stands for Boat Cable with 105°C dry and 75°C wet heat and moisture resistance. The Boat Cable means that it is flexible, i.e. multistranded and usually tinned.
I managed to install a 3/4" electrical PVC conduit on a starboard side. The original one was too small for the number of wires that I had to pull through it. I used it for data wires though such as a wind vane, a flux gate compass and an antenna for a short wave receiver. I ran a VHF cable separately.
The good thing was that Niemiec Marine had parts department and West Marine was next to the boatyard. Plus two other West Marine stores in 5 and 15 minutes away. The fact that they sometimes didn't charge me for bolts and nuts and replace wrong or defective parts without asking for receipts may give you a hint about the amount of money I spent there. Unfortunately, their 10 percent discount for a new boat owner program expired in a month when I hadn't yet finished my project. Sometimes guys at the store were nice and gave me a discount anyway.
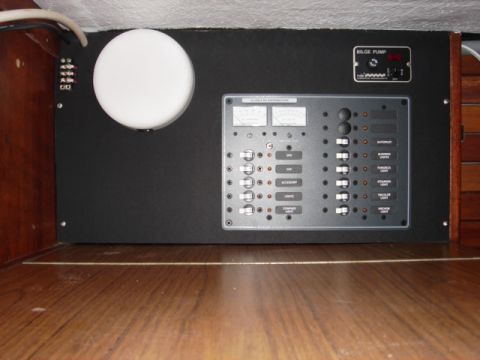
Electrical panel
I got a high quality 13 circuit electrical panel with LED indicators for each circuit that came with 10 15A breakers, an ammeter, a voltmeter to monitor up to three sources and backlights. I adopted one of the unused panel's LEDs as a remote indicator for my battery banks' isolation/combining switch. I added one 10A breaker for an autopilot. The 15A breakers are really useless on my boat, and they are expensive to replace, so I just complemented the breakers with a 10-circuit fuse panel. The breakers will be used as simple on-off switches and the over-current protection will be provided by the fuses. Above the panel I mounted the Rule's bilge pump auto-manual-off switch with an indicator and a 10A fuse.
I installed the panel into a black marine plywood called starboard, which is a plastic half-inch thick board. The plastic is similar to ABS, it can be drilled or cut with wood-working tools. The only problem with it is a saw dust that gets electrified and sticks everywhere - a pain to clean.
Because the panel is where a navigation desk is I mounted a white-red LED light there.
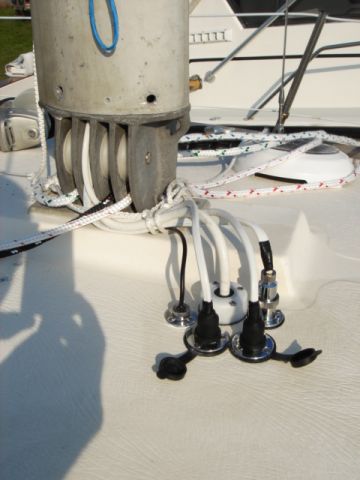
Leading mast wires under the deck was another challenge, especially with flat cables. Most through-deck fittings are designed for round wires such as rubber ring compression style ones. I used them for a VHF antenna and a wind vane cables. Three light cables are flat and I had to go with plugs. I was not happy about them. I think they might leak.
July 2009. Replacing though-deck fittings
Indeed, the plugs did not hold well and I somehow managed to use non-stainless screw for mounting one of the plugs which caused the plug to be eaten by the corrosion in no time (could be a stray current, the plugs did not seem to have been waterproof).
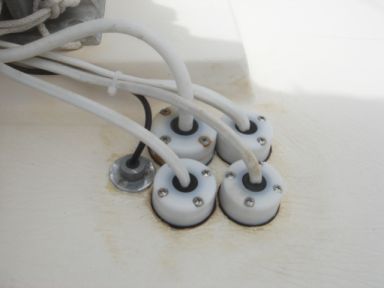
As you see to the left, I replaced the plugs with the standard compression fittings, those that come with a rubber disk and require drilling a hole in it. I tried to make a hole in a shape to accommodate a flat wire rather than drilling a round hole. I just crimped the wires under the deck. I doubt that I demast often.
| Circuit | Required Amperage, A | Fuse/Breaker, A | AWG wire size |
|---|---|---|---|
| Starter positive to three-way switch | - | - | 1/0 |
| Starter negative to common bus bar | - | - | 1/0 |
| Battery positive to three-way switch | 250 | 300, fuse | 2 |
| Battery negative to common bus bar | - | - | 2 |
| Battery to isolation/combining switch | 60 | 80, fuse | 4 |
| Isolation/combining switch to common bus bar | - | 10, fuse | 14 |
| Isolation/combining switch to engine start switch | - | 5, fuse | 16 |
| Isolation/combining switch to a remote LED on the panel | - | 1, fuse | 16 |
| Panel positive to three-way switch | - | 80, fuse | 4 |
| Panel negative to common bus bar | - | - | 4 |
| Bilge pump/float switch positive to auto/manual switch on the panel | 5 | 10, fuse | 14 |
| Bilge pump negative to common bus bar | - | - | 14 |
| Raymarine autopilot | 5 | 10, breaker | |
| Raymarine electronics | 10, autopilot breaker | ||
| Mast-top tri-color LED | under 1 | 2, fuse | 16 |
| Anchor LED | under 1 | 2, fuse | 16 |
| Steaming LED light | under 1 | 2, fuse | 16 |
| Deck light | 1 | 5, fuse | 16 |
| Running LED lights | 3, fuse | 16 | |
| Cabin LED lights | 5, fuse | 16 | |
| Car adapter for 100W inverter | 8 | 15, breaker | 16 |
| Multifunctional display C90W with GPS | 7, fuse | 16 | |
| Short wave receiver and VHF | 15, breaker | 16 | |
| Backlights and compass lights | - | 1, fuse | 16 |

October 2010. New 130 Watt Solar Panel
Kyocera KC130TM. Connected to the SES Flexcharge USA high efficiency charge controller (NC25A-12) as the solar panel.
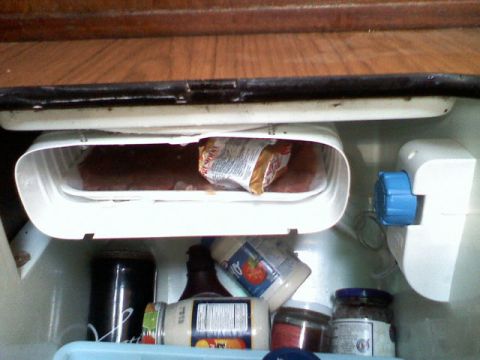
October 2010. Fridge
WAECO CU-55 35-watt compressor and VD-07 evaporator.
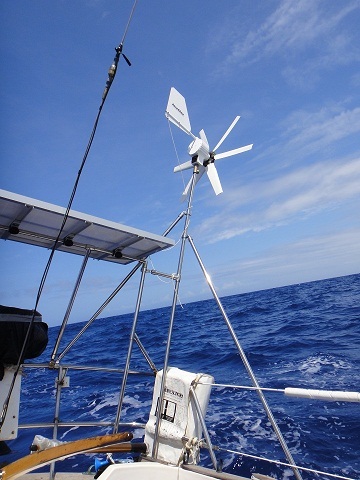
June 2011. Windgenerator
LVM Products Aero4gen. 6 blades. 6 to 8 amps at 20-25 knots. Connected to the same charge controller as the solar panel. Added 70 Amp blocking diode on the heat sink to protect the solar panel from possibly high voltage of the wind generator. Installed the 24-volt 240-watt halogen bulb as a divert load.
In November 2012 I replaced the burned out bulb with 1-ohm 300-watt resistor.
In May 2014 before my third Atlantic crossing two ball bearings that allow the windgenerator turn around its vertical axis fell apart. Literally. The balls converted to the rust dust. Therefore, it seemed impossible to pull the inside ring from the axis to install the new bearings. I ended up inserting a plastic ring there instead.
Because the plastic rings were not made precisely, the wind generator wobbled and its brass rings that connect to brushes touched the body connected to the ungrounded railing. In wind gusts one could get an electric shock, especially if hold the railing with wet hands.
In January 2016 in my preparations for the Pacific, I managed to break those inside steel rings with a hummer and install two new bearings. I also grounded the railing. I guess it might help with lightening strike too.
May 2014. Curacao. Third battery in the house bank
I replaced one battery in the house bank and added one more. The other old battery seemed to be ok after I treated it with higher voltage (16 volts, the maximum that my voltage regulator allowed) for a few days to kill the sulphation.
January 2016. Curacao. Replaced the old battery in the house bank
April 2017. Whangarei, NZ. 220 volt wiring
Winters in NZ require a heater and a dehumidifier. Therefore, I needed to install 220 volt system. According to NZ law, it could only be done by a qualifying electrician. When I met one, he said that he was super busy. I then offered to do the job for him. All he needed to do was to certify my system. I installed it according to his guidance.
Initially, it was very simple system: one 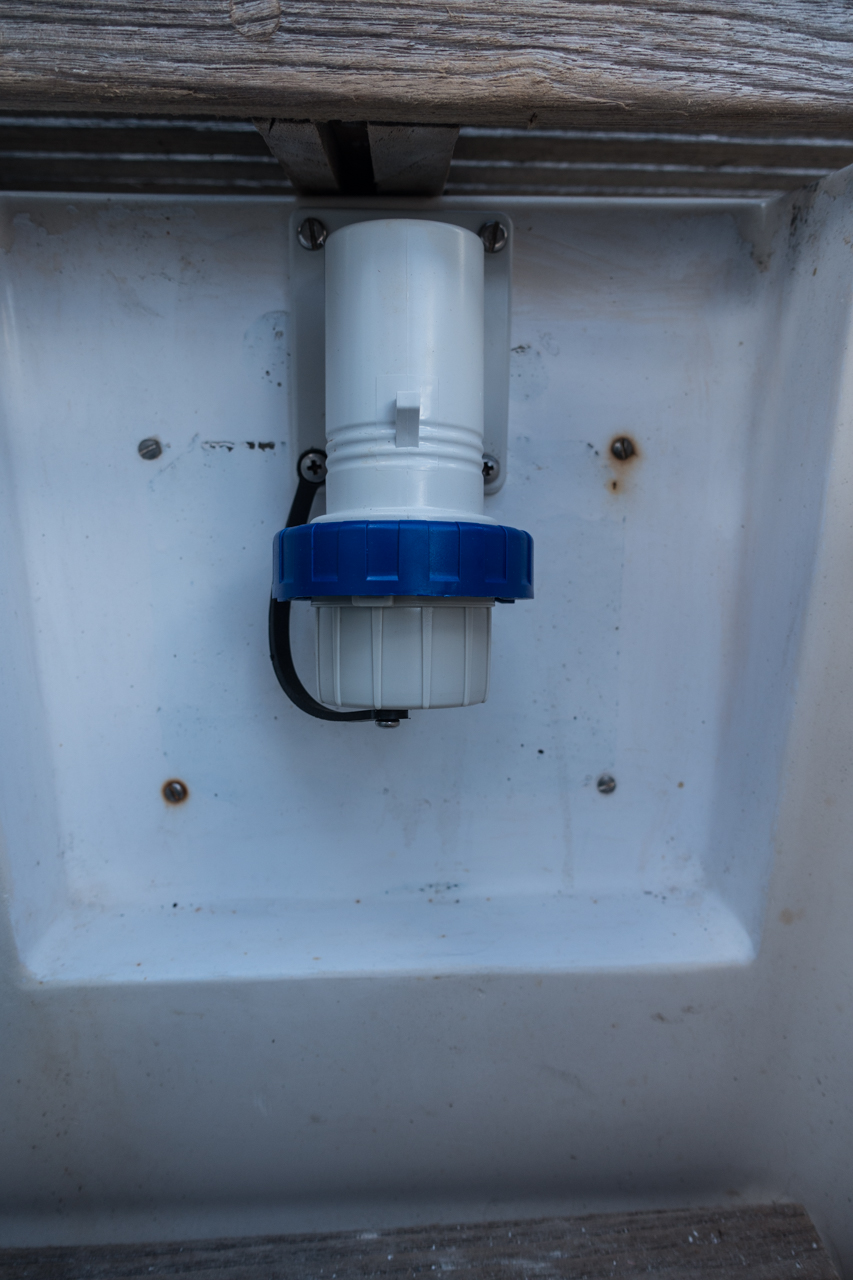 plug in the cockpit, wiring to the navigation table in the cabin to a breaker panel with three breakers and one dual-socket outlet under the panel.
Later I added three more
plug in the cockpit, wiring to the navigation table in the cabin to a breaker panel with three breakers and one dual-socket outlet under the panel.
Later I added three more 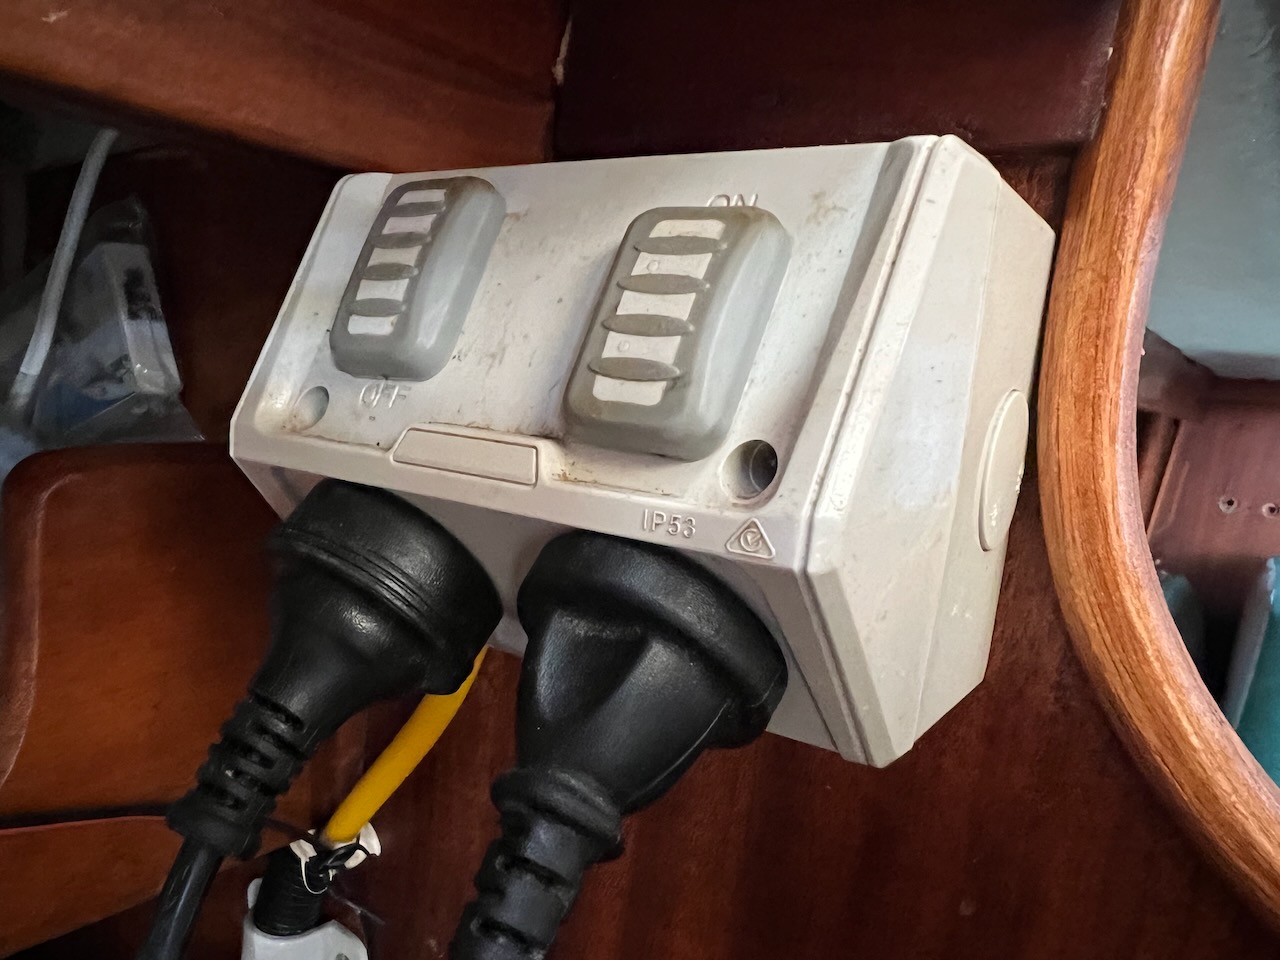 outlets: one in the head, one in the galley and one in the cabin on the mast bulkhead.
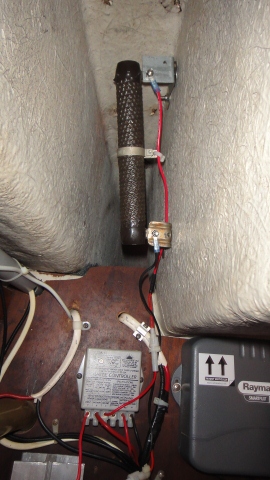
January 2018. Auckland, NZ. Carbonfiber heating panel
The first winter I used radiant plasma heater with 3 tubes, each 800 watt. It was cheap and worked well but occupied a valuable space in the cabin.
I also installed 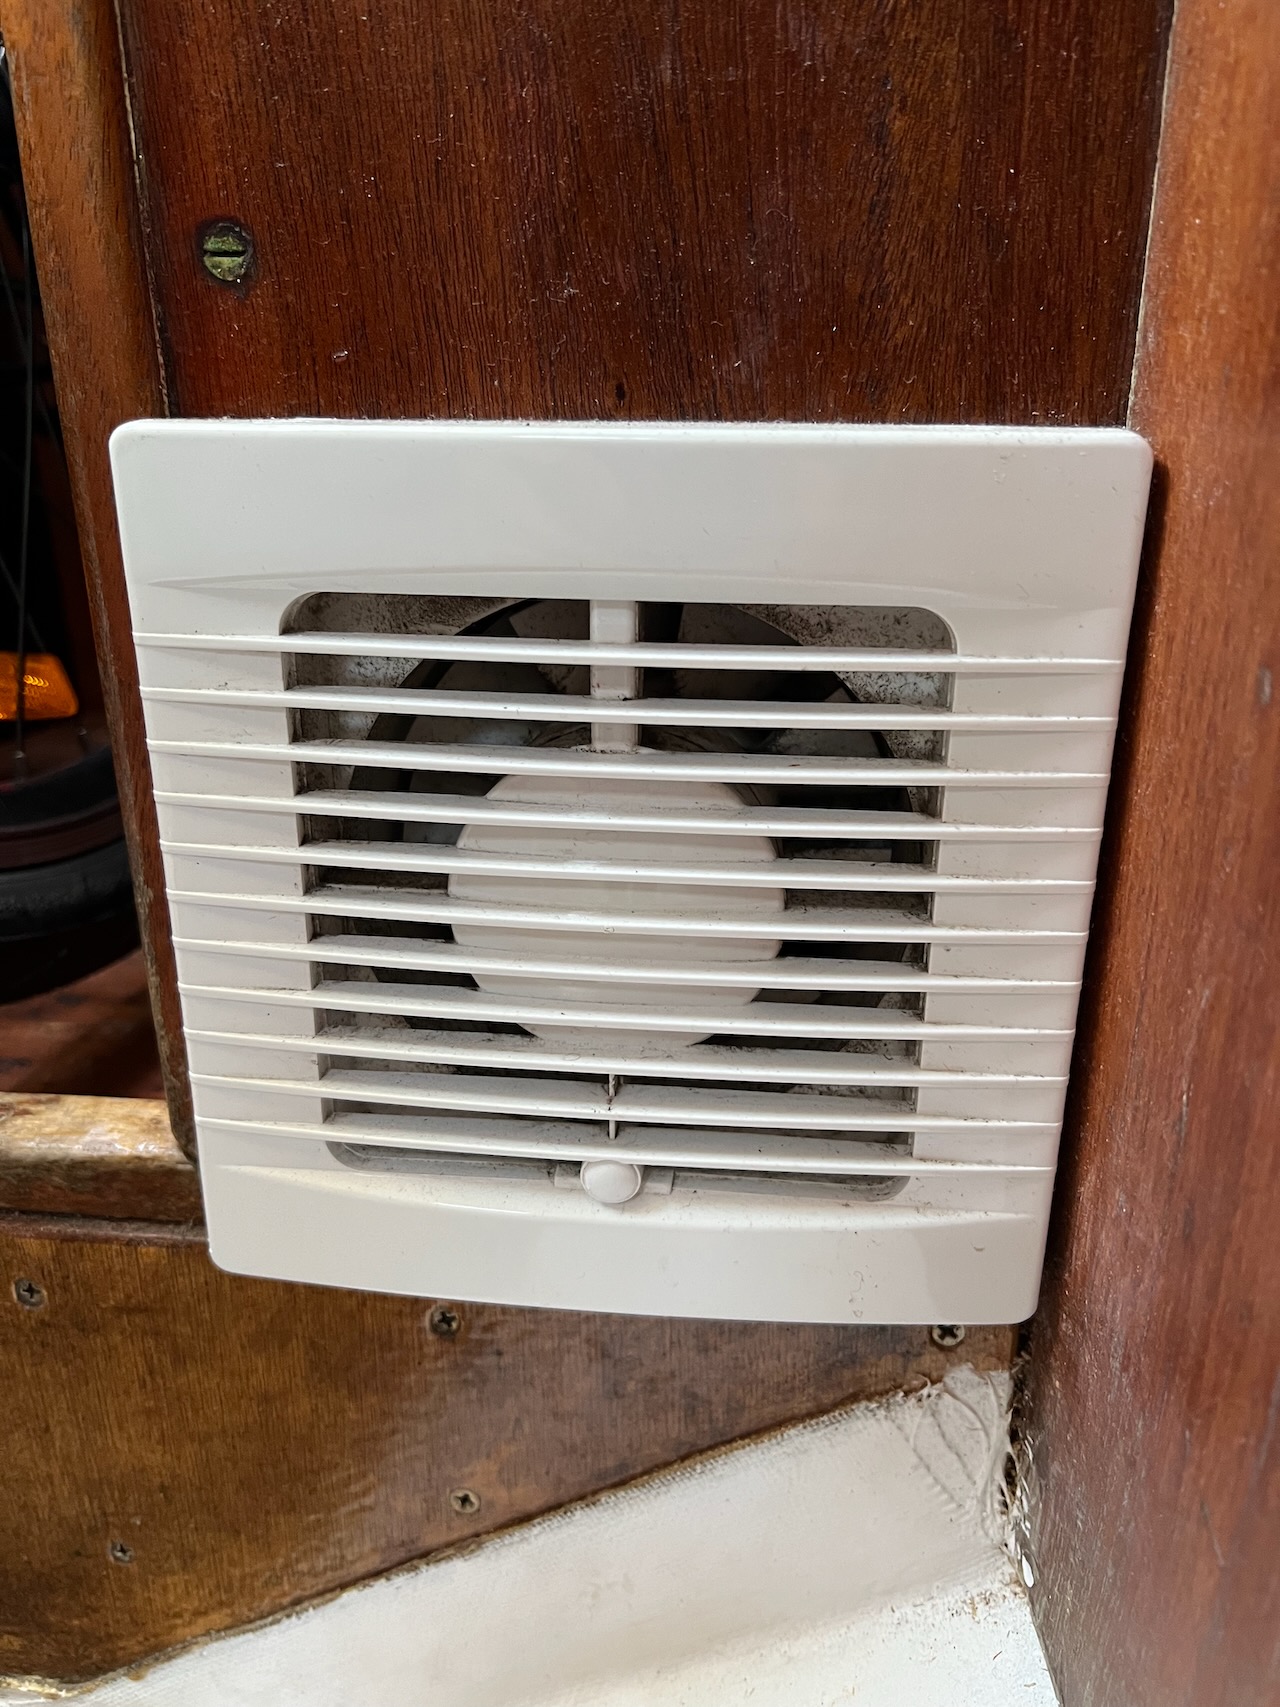 220v ventilator in the head attached to the old solar vent. The duct hanging from the ceiling again was taking the valuable space in the head. Moreover, it provided a fresh air but did very little to reduce the humidity. An outside air at night had enough moisture in the marina. Next winter I finally bought a portable dehumidifier, I kept using the ventilation for its direct purpose - to supply a fresh air. It was controlled by Wi-Fi relay, which I made from ESP-01s (based on ESP-8266). My Raspberry Pi had Bosch air quality sensor, so the ventilator was turning on and off depending on the air quality.
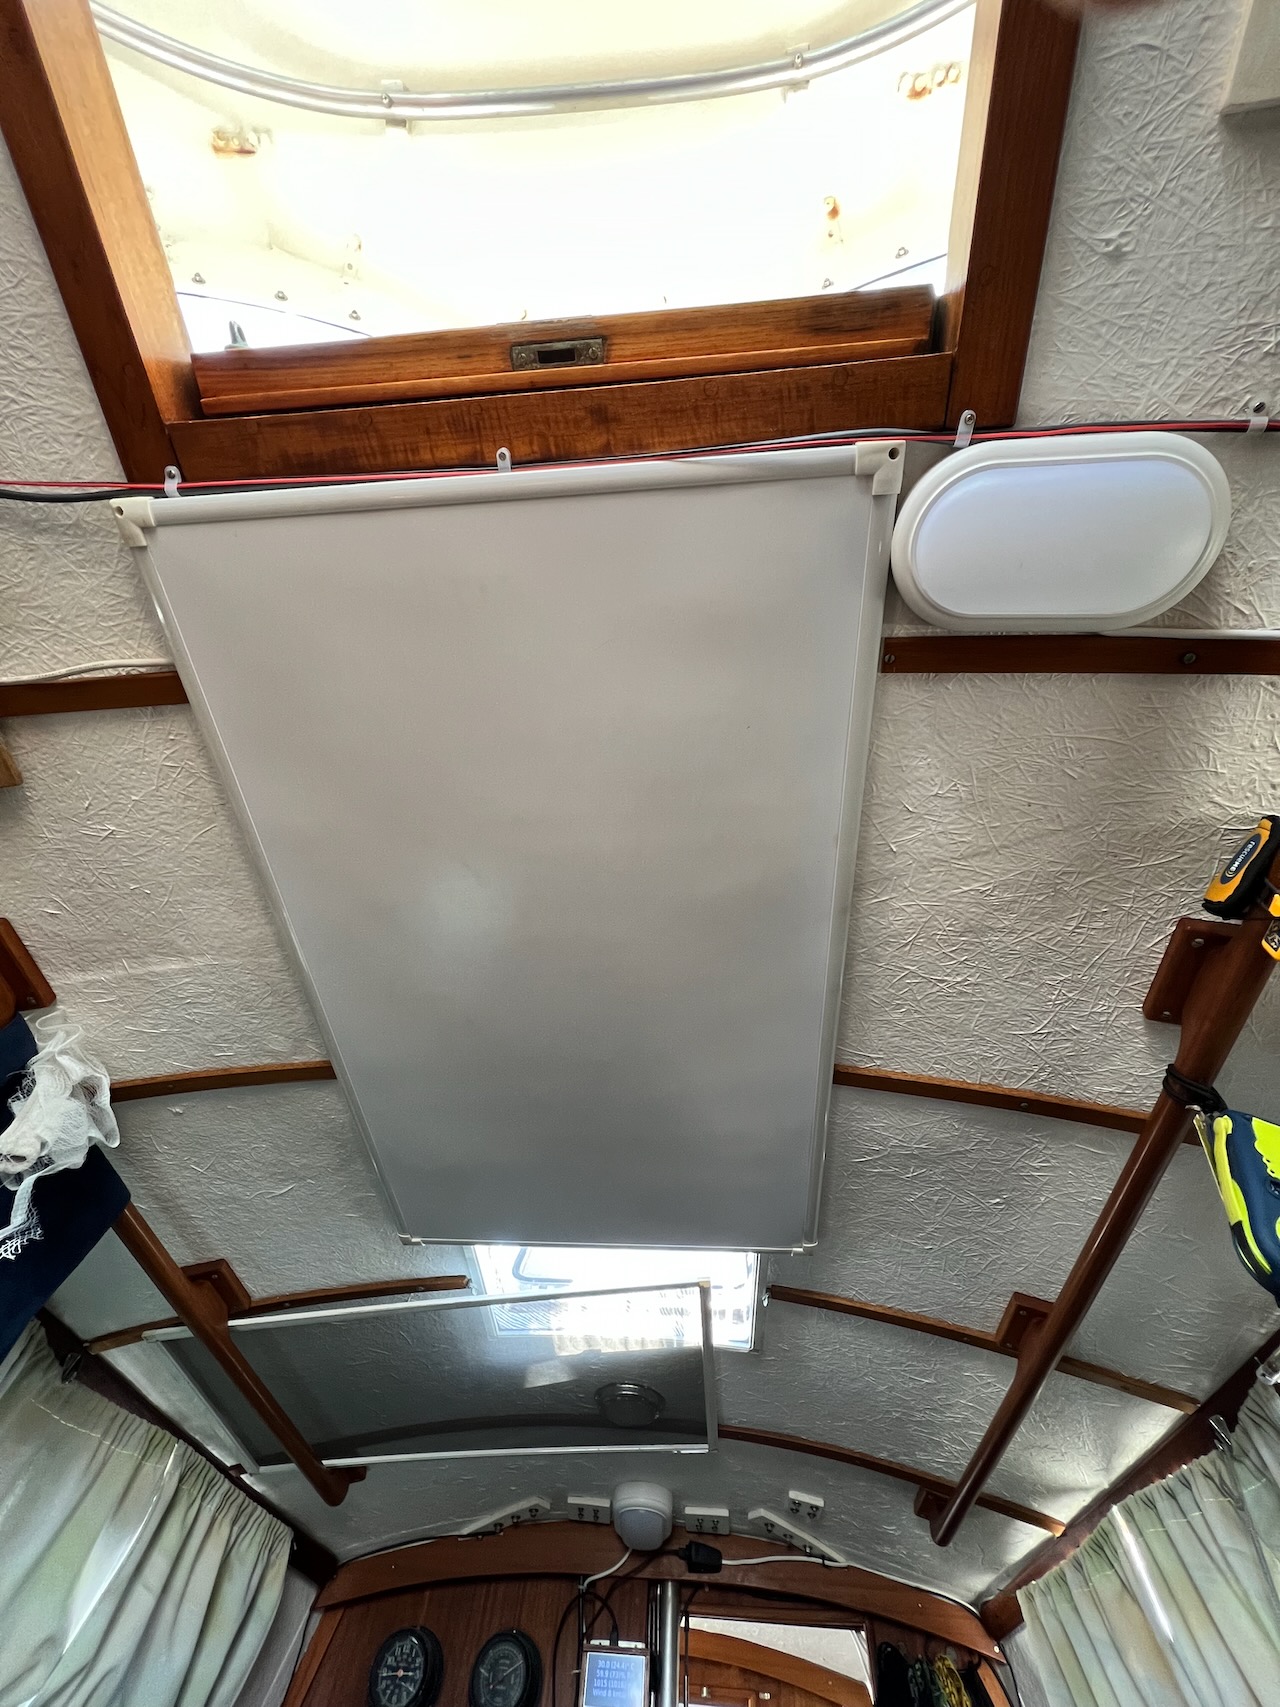
At the end of second winter I bought 600 watt carbonfiber heating panel, which I mounted to the ceiling in the cabin. It was powered via a temperature-sensing relay. It could have been controlled via Raspberry Pi as well because it had a Bosch temperature sensor. I just had that relay anyway.
Later I added two 220 v lamps for the cabin. You can see one on the photo.
The dehumidifier was set on top of a sink in the head and drained to the sink. It was controlled via the same Wi-Fi relay from the Raspberry Pi with a Bosch humidity sensor.
June 2019. Auckand. NZ. New alternator
My 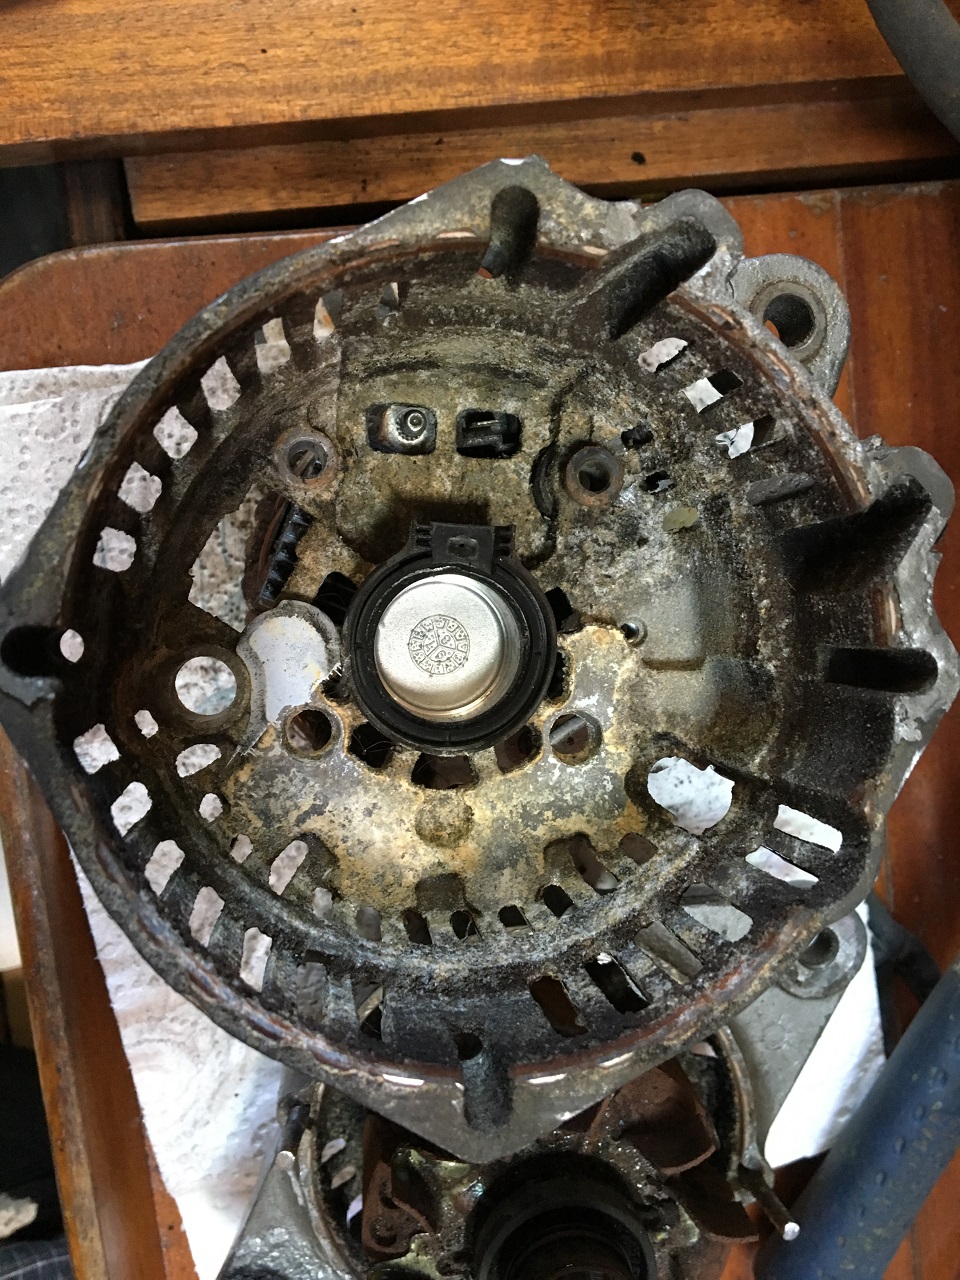 original 60A Hitachi alternator that came with the new Yanmar engine, finally died of corrosion after 10 years of service. I replaced it with 80A Chinese replica.
2020. Auckand. NZ. New AGM house batteries
A local marine store had AGM batteries on sale. I just needed to replace at least one house battery. Mine were usual sealed deep-cycle lead batteries around 100Ah. Because the batteries in a bank should be of the same type, I had to replace all three. I hope AGM batteries would serve me longer.
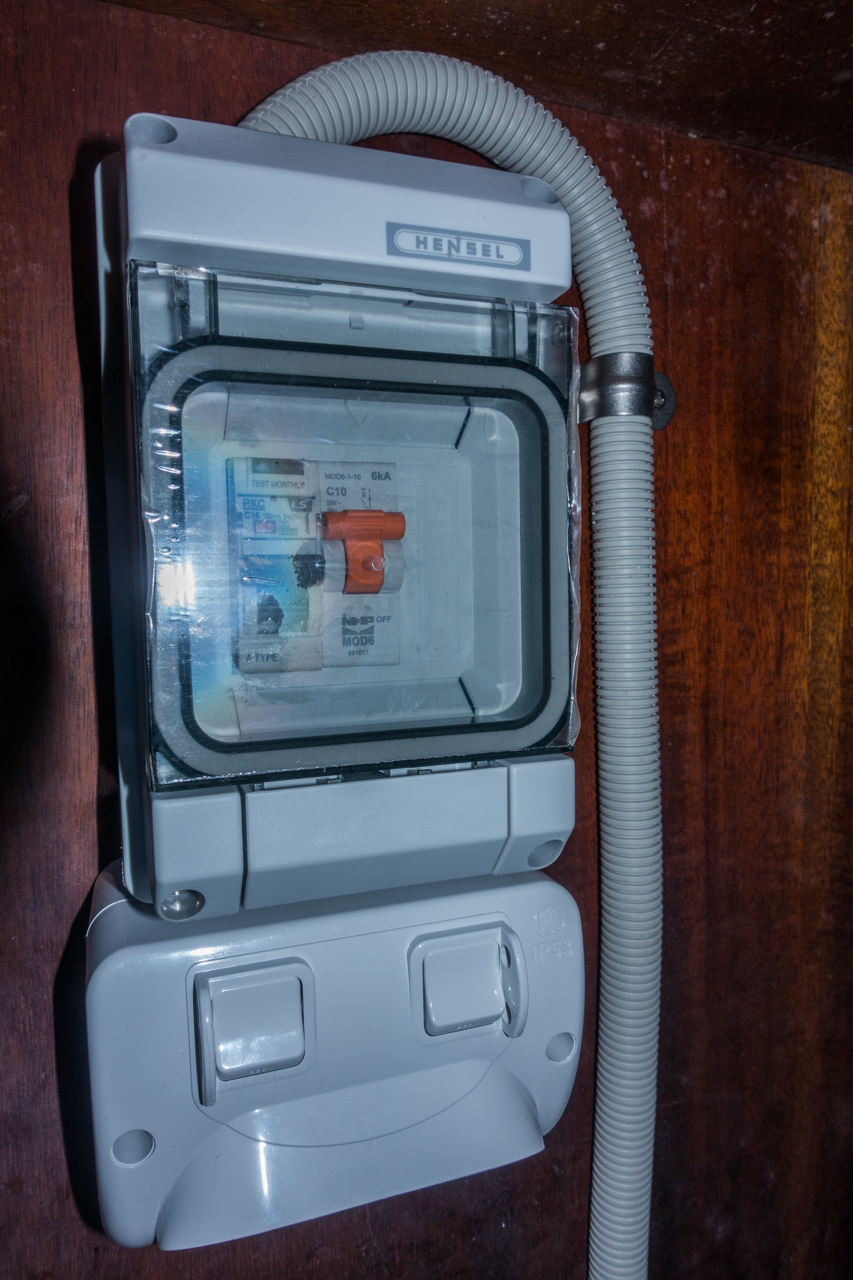
March 2023. Auckand. NZ. New electrical system
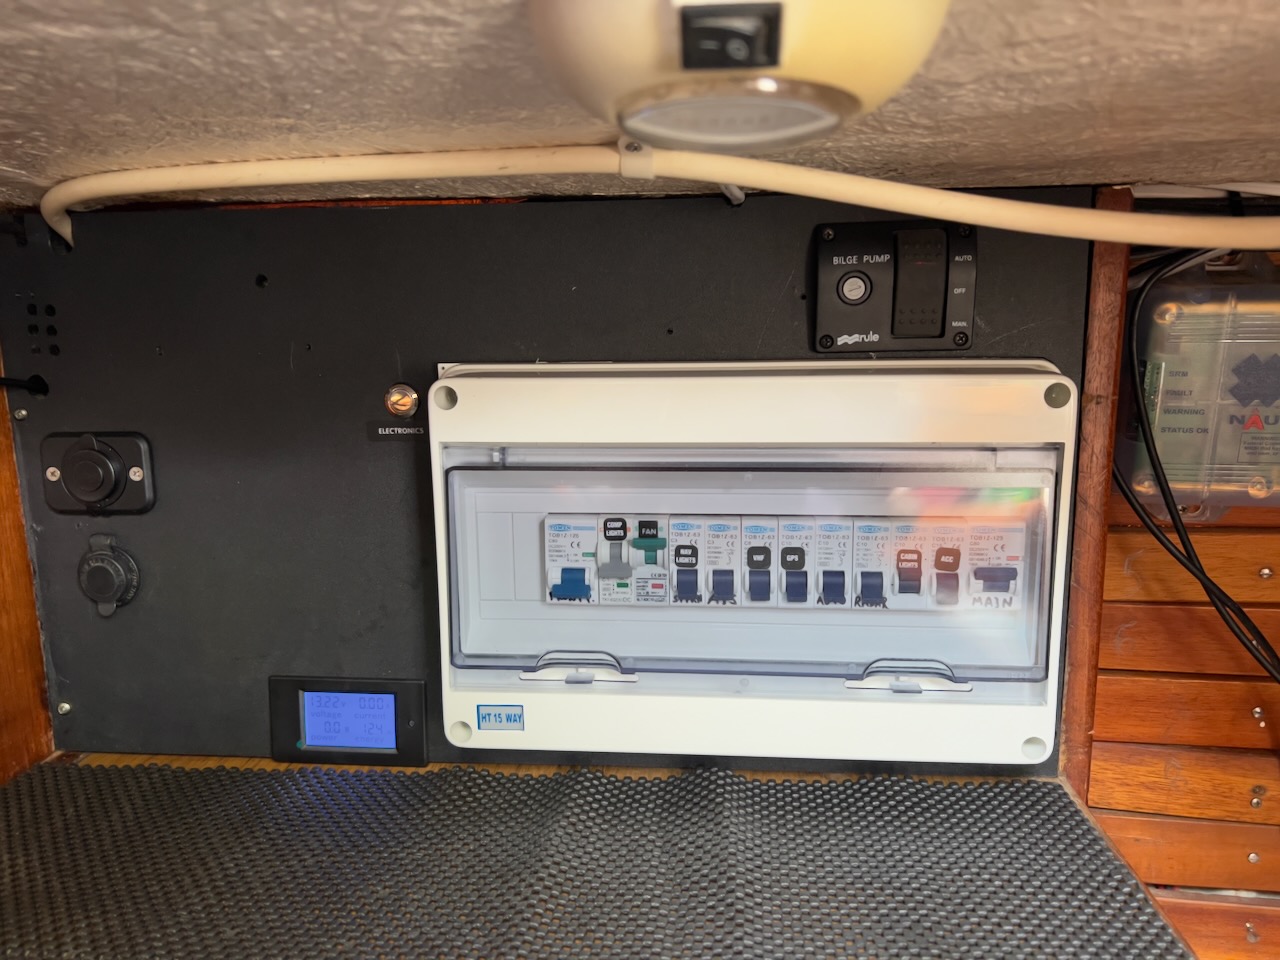
After 15 years of not an ideal electrical system that I had installed, it was time to replace it with a better one. The main mistake that I had made was not using waterproof junction boxes and the main breaker panel. I rebuilt the system using Chinese parts purchased on the Ali Express for houses. I added two more IP-67 standard (non-marine) breaker panels, 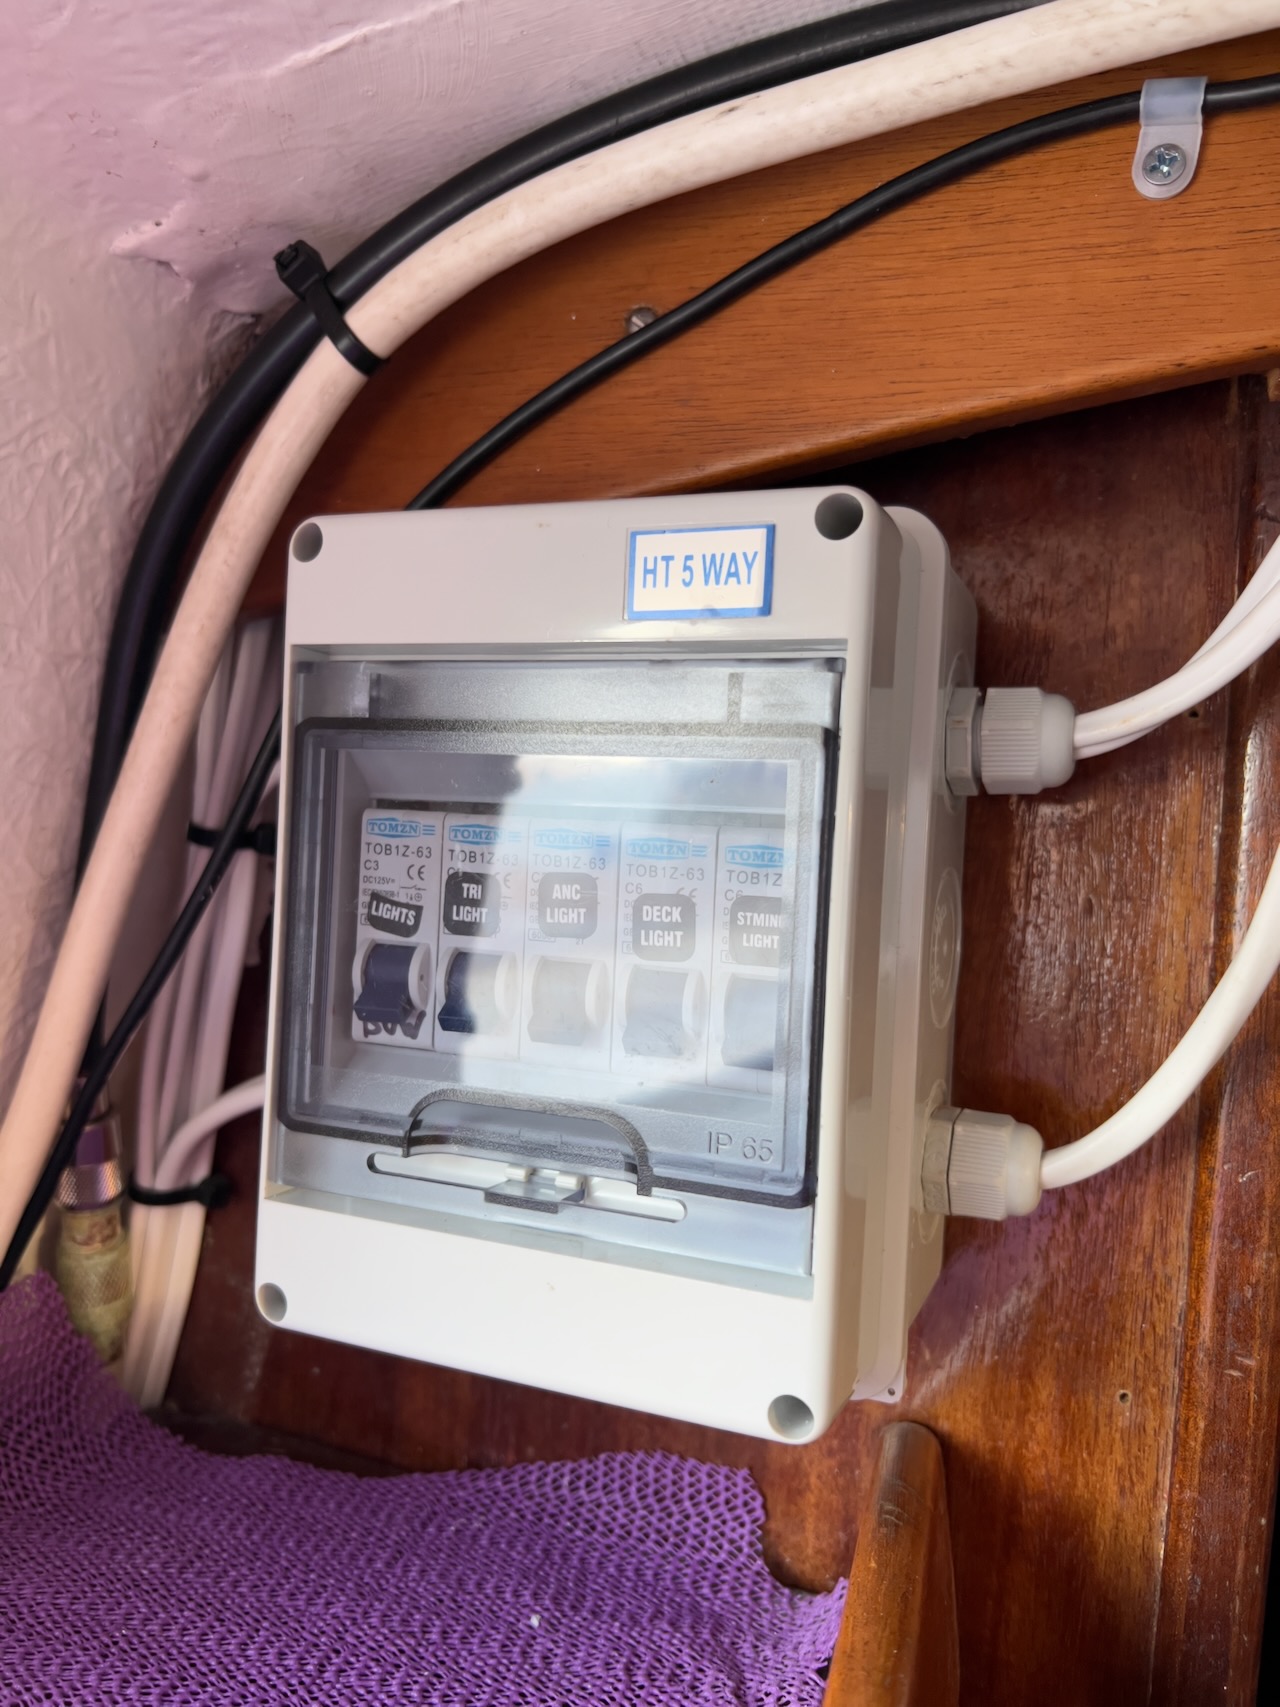 one - in the head for mast and bow lights, and
 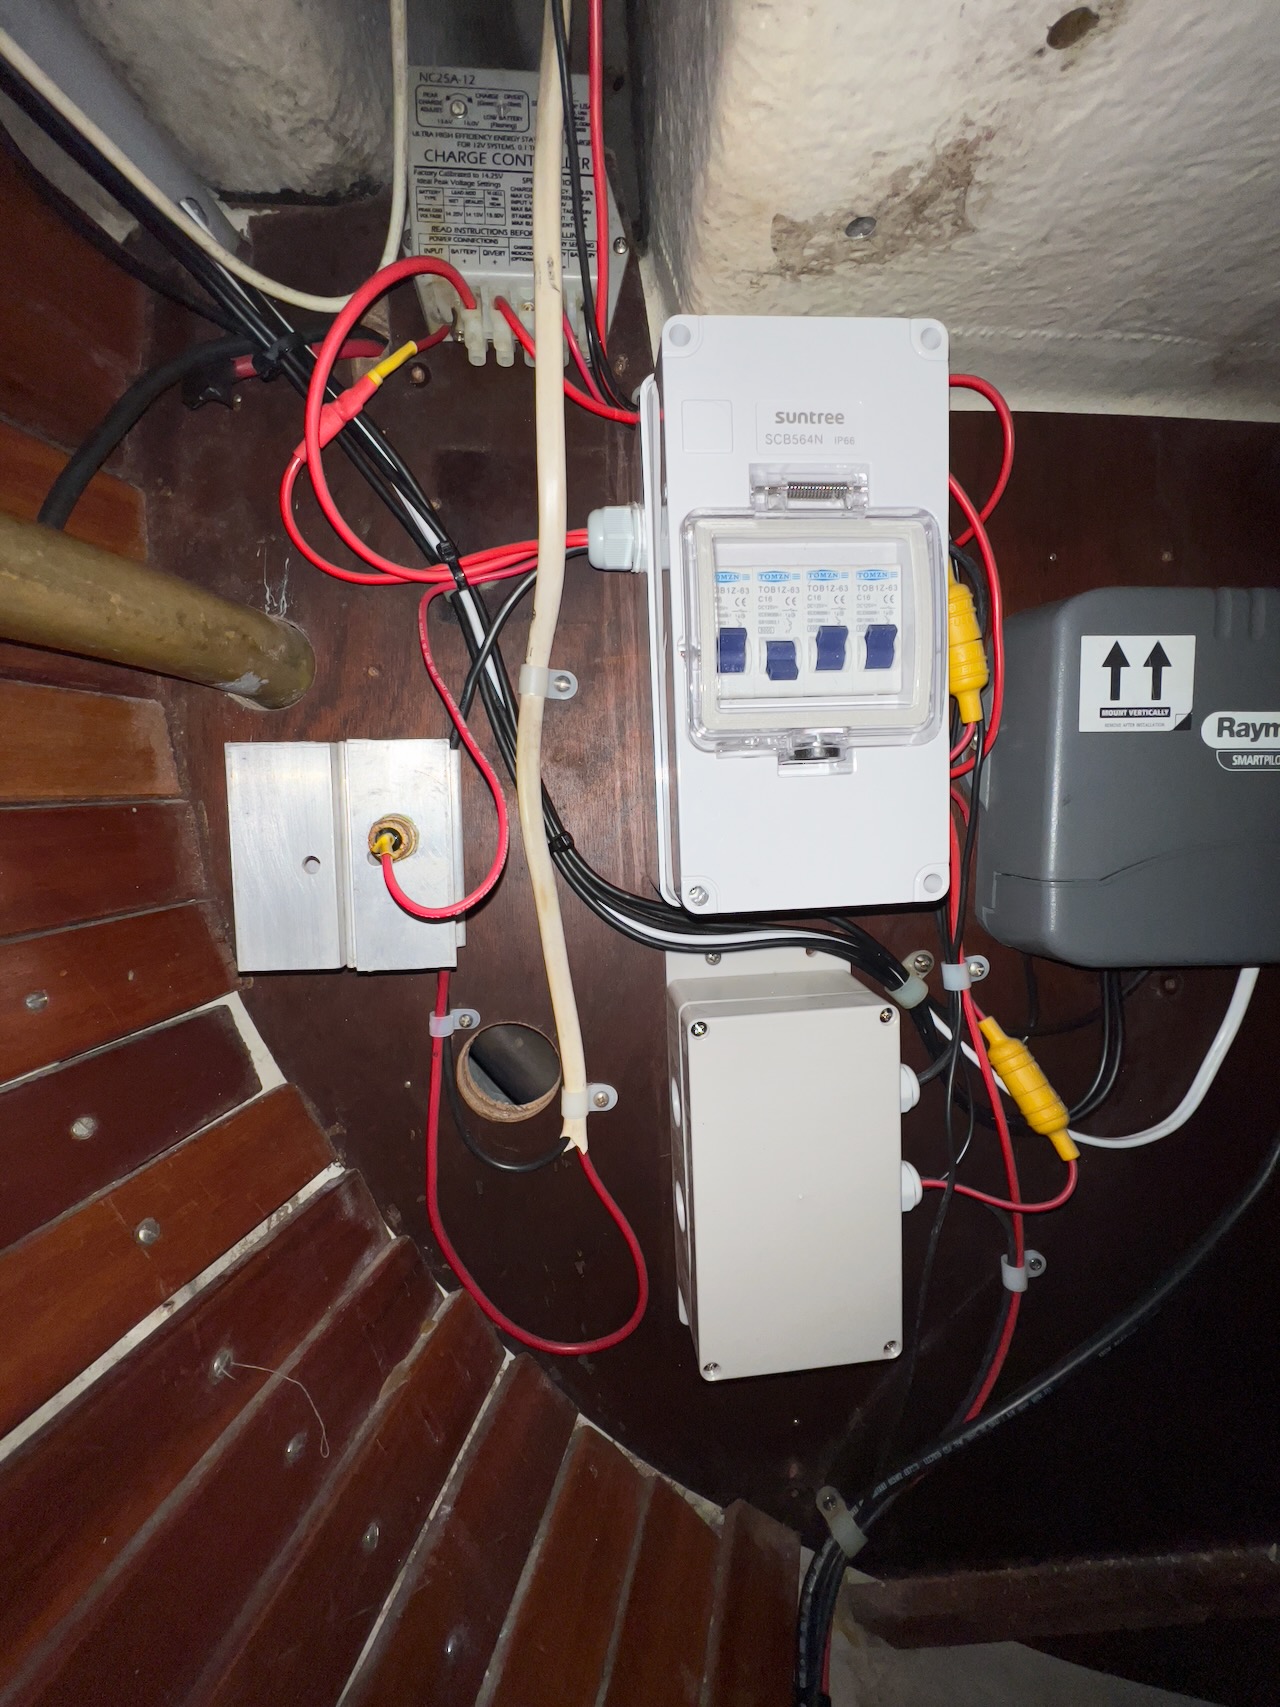 one in the quarter-berth - for solar panels. I also added current consumption and charging monitoring devices (shunts with digital displays). One was installed in the main breaker panel for the consumption monitoring and the other one, wireless, at the quarter-berth - for charging. I used standard (non-marine) DC breakers, which can be sourced in most amperages and much cheaper. In addition to the breaker panels, I installed four IP-67 junction boxes - no more exposed connections anywhere, which were prone to a rapid corrosion.
The wind generator had required a new stator meaning that the price to replace it would have justified buying a new one. Unfortunately, I was not able to find a small wind generator. On the other hand, I was not too happy running a wind generator in general. It worked ok at the anchorage but when sailing because of rolling, it had difficulties aligning with the wind direction and constantly losing RPMs due to a rotation around its vertical axis. In other words, it was not very efficient in light to moderate winds. It worked better in strong winds. Anyway, I removed it and installed another 200 watt solar panel instead. It took a place of a 130 watt old panel, which I relocated to the deck in front of the pilot house.
May 2023. Auckand. NZ. New AGM starter battery
Just before departing New Zealand, the starter battery died. Since all three house batteries were already of AGM type, I replaced it with AGM deep cycle one.