


Rigging
December 2008. Standing rigging
As for the rigging, my plan is to add an inner forestay, route all the running rigging back to the cockpit, which implies an addition of a pair of winches, some blocks, cable organizers, rope clutches and bags. I also want to hide the reefing lines or maybe just an outhaul inside the boom and substitute the topping lift with the rigid boom vang to have one less line to deal with during reefing.
Standing rigging should be replaced because all the swages have a banana shape, which is unacceptable and the age of the rigging is unknown. I'm thinking of using the Sta-lock type of fittings for the ends.
I will replace all the lights with an LED type. I will add a VHF antenna to the mast and possibly a radar. A backstay will be used for an SSB antenna.
March 2009. New standing rigging
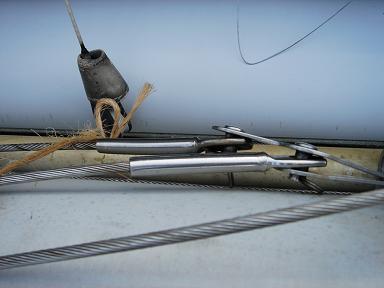
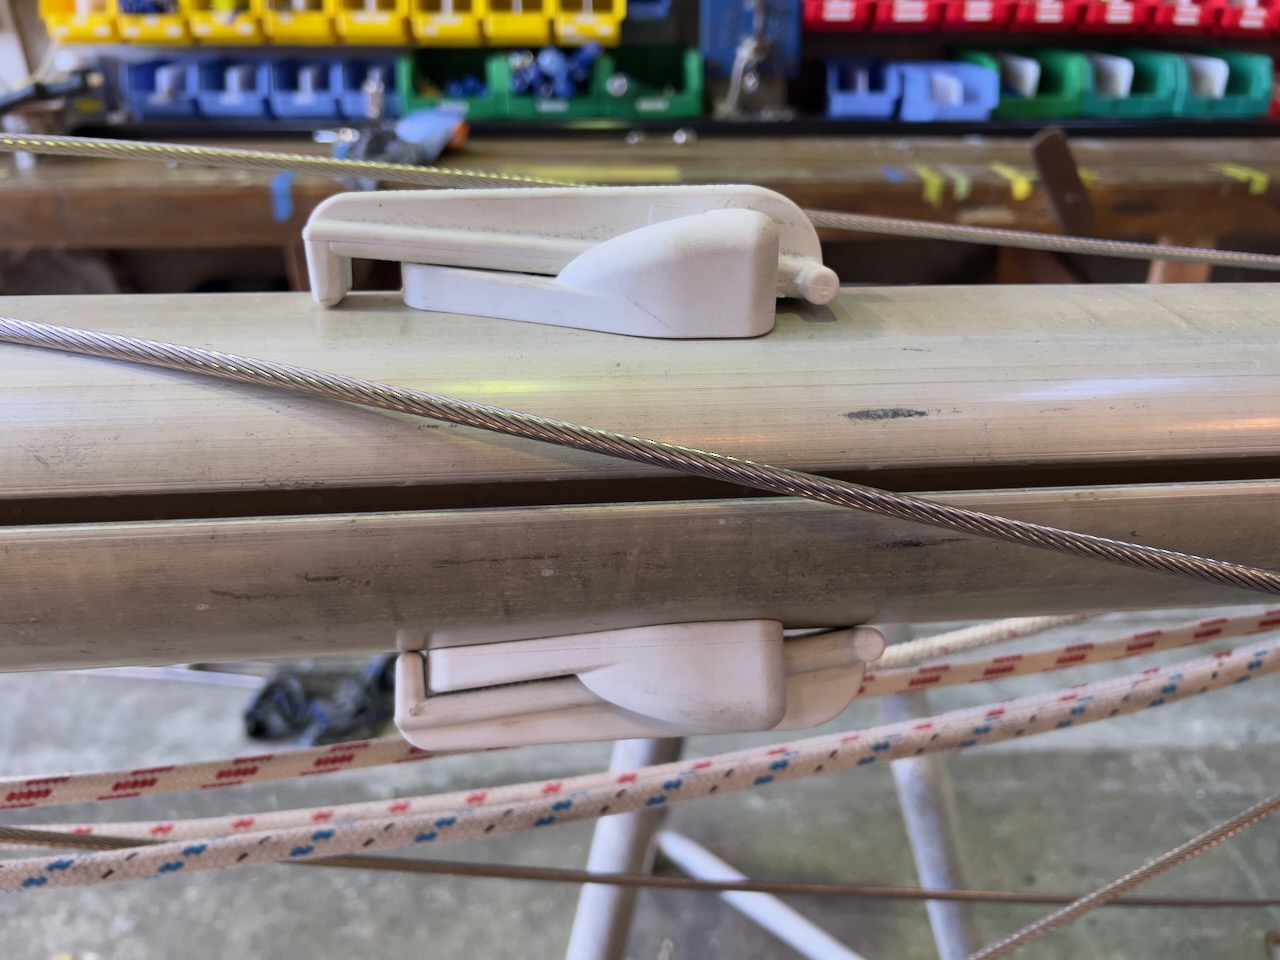
I ordered the new rigging from Rigging Only conveniently located 5 minutes away from Niemiec Marine. All wires are now 1/4" (originally they were 6 mm) 1x19 316 SS, top ends swaged and I put Hi-Mod fittings (designed by Petersen in UK) on the bottom ends to keep corrosion under control in tropical waters. These fittings are similar to well-known Sta-lock type but easy to install, removable and reusable. The insulators for the backstay are also Hi-Mod.
Rigging Only did an excellent job swaging the top terminals - they are perfectly straight now.
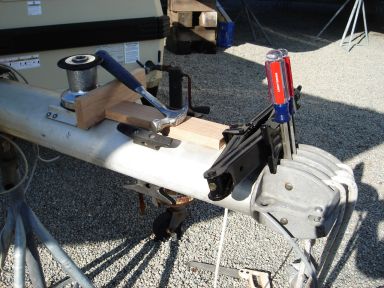
I decided to go with a rigid boom vang. For this I needed to replace the original adjustable cunningham with a stationary one. The rigid boom vang would allow me to get away without a topping lift - less line to worry about during reefing. I brought the trace of the mast to Rigging Only and they made me a new cunningham.
April 2009. New running rigging
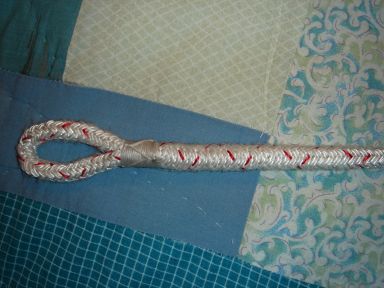
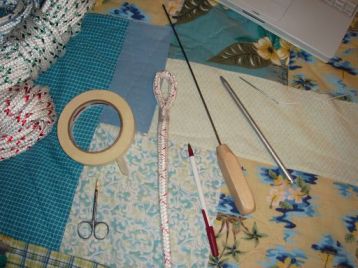
The running rigging was old too. I completely replaced it. First, I had to learn splicing. All I knew was how to splice traditional twisted ropes. The new ropes are entirely different. The majority of my lines are braided with a parallel core with an exception of a spinnaker halyard, which is double braided.
Initially, I had thought that I could not do it. Too tough! But with each attempt I moved slightly further and further. By the morning all five halyards were spliced. I consulted the Rigging Only about whether to use thimbles or not. They suggested to not. Hm... maybe then people need to replace their lines more often? They were kind enough though to give me a free whipping twine and a needle.
What I didn't realized was that shackles for genoa, jig and spinnaker halyards should have been put in lines during splicing. Now I would most likely need to redo the splicing. Learning and learning...
Second, I had to find a way of pulling the new ropes through the mast. I could have used the original lines but I was worried that if they had been twisted, I would have been in trouble. Luckily, I could use the vane from the original furler.
I decided to go with a traditional hanked genoa and a jib. I attempted to disassemble the furler and keep it for a future. Unfortunately, I couldn't figure out how take the vane apart. I think it had been glued. Anyway, it worked nice as a pusher or puller.
The work would have been more enjoyable if I could remove the mast step. No way! It got stuck. Even after I drilled the frozen SS screws out and tried to jack it out - no luck.
All six lines went fine. Three on each side. Here they are:
| Purpose | Side | Colour | Length, ft | Thickness, inch |
|---|---|---|---|---|
| Main halyard | Port | Blue | 86 | 3/8 |
| Spare main halyard (former topping lift) | Starboard | Green | 86 | 3/8 |
| Genoa halyard | Port | Double red | 90 | 3/8 |
| Jib halyard | Port | Red | 90 | 3/8 |
| Spinnaker halyard | Starboard | Red | 86 | 3/8 |
| Spinnaker pole halyard | Starboard | Black | 70 | 5/16 |
I also replaced all the sheaves at both ends because they were worn out. The top wires for the new LED tri-color/anchor light - AWG 16 triplex, VHF - 213 coax cable for the new antenna and the Raymarine wind vane were also pulled without a problem. The difficulties arose when I needed to pull two wires for steaming and deck lights that exit the mast through small holes somewhere in the middle of the mast. Here again I could use something that I was just about to discard - the original wire halyards! The wire was small enough to go through the holes and stiff enough to reach the mast step where I used various tricks to get it out but all in all it worked!
I tried to solder a connector for the VHF antenna first with a 35W soldering tool, then with a 150/400W gun and finally with a propane torch. The torch of course was the only tool that really worked.
I decided to keep the enclosures for the deck and steaming lights and replace the bulbs with power saving LED substitutes. Since I couldn't find the LED for the deck light, I used the original 10W incandescent bulb. It is going to be on for a short amount of time anyway.
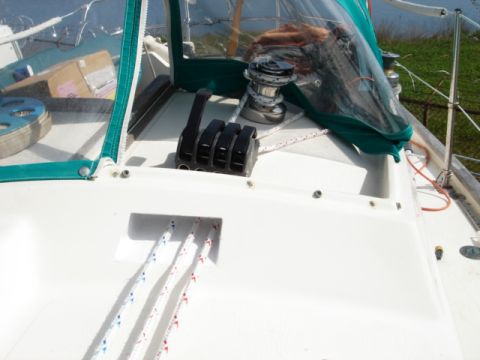
The plan is to bring all the lines into cockpit. In order to do this, I would need to add two four-line deck organizers, one on each side, two blocks of four rope clutches and two winches.
I'm tempted to use single line reefing system although it might be too tough for my main.
April 2009. Standing rigging
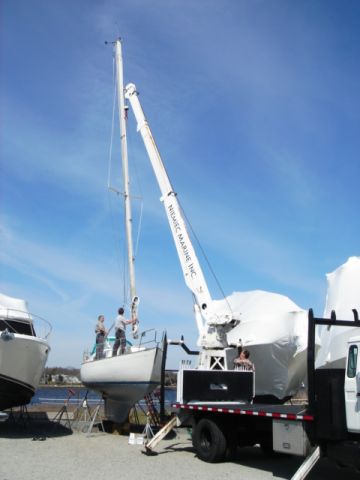
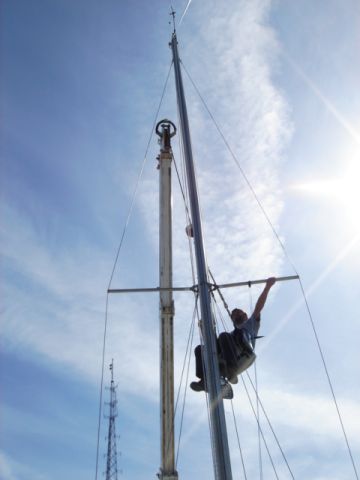
Stepping the mast
The mast was now ready for stepping. I asked Niemiec Marine for help again. Chris charged me a tube of Tef-gel that he recommended applying to turnbuckles to prevent them from being seized under load.
I insisted that spreaders should have been jammed to the upper shrouds at the correct angle while Chris was saying that usually they let the shrouds run freely through the spreaders. At the end, he agreed to jam them. Spreader boots were left to be put on during the final rigging tuning on water.
That day I was busy putting epoxy barrier coats on the bottom. I only left four stands for that. After the mast was stepped, the boat became less stable. Next day after the paint dried I added three more stands.
People say that with a mast it is looking much better, like a real sailboat. It is also sounding like a real sailboat with all the lines banging the mast in unison with other yachts.

Running rigging
Bringing lines back to the cockpit
I decided to bring all six halyards (genoa, jib, main, spinnaker, topping lift or spare main and spinnaker boom lift) and two reefing lines of a single-line reefing system back to the cockpit - total of 8 lines: 4 on each side of the cockpit. Therefore, I installed two four-line deck organizers, two deck blocks near the mast step, two four-line stoppers and two Andersen self-tailing winches #18.
I had to cut the holes in the dodger coaming for the lines. To finish them, I closed the holes with a masking tape, then put 1 to 3 layers of fibreglass tape over it. Next day I trimmed the edges and removed the mold along with the masking tape. I wrapped the mold with another layer of the fibreglass tape and glazed it into the hole. I let it cured, then filed and sanded the edges. Then I painted it white with finishing enamel.
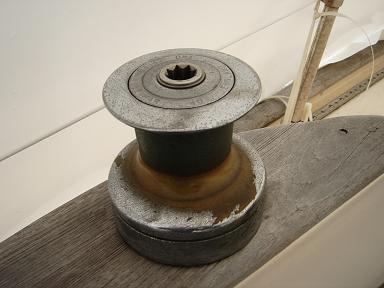
Summer 2015. Curacao. Starboard winch repair
The starboard Lewmar winch got difficult to turn. First, I thought that maybe it died and needed to be replaced but after I checked the prices for new winches... I decided to look into the problem further.
It was not hard to take it apart. Its base had to be removed from a coaming though in order to hammer out the gear axle, which had to be cleaned and lubricated.
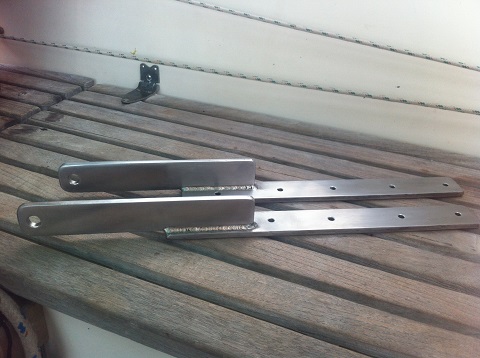
October 2015. Curacao. New stern chainplate
The original stainless steel stern chainplate (6 x 35 mm) shows signs of cracking and had to be replaced. I was able to source 8 x 40 mm 316 SS bar in the local shop and brought it to Curacao marine for drilling and bending. I polished and installed it myself later.
March 2016. Curacao. New chainplates
Since I have already replaced the stern chainplate last year, I thought it was time to check the other ones. It was hard to see the condition of the chainplates where they pass through the deck. I had to take them out. This would have been the hell of a job to disassemble all the shelves in the cabin. I ended up cutting a hole in the shelves and removing all the wooden planks along the sides. Lots of dust and mold were behind them. Cleaned and painted.
Yes, 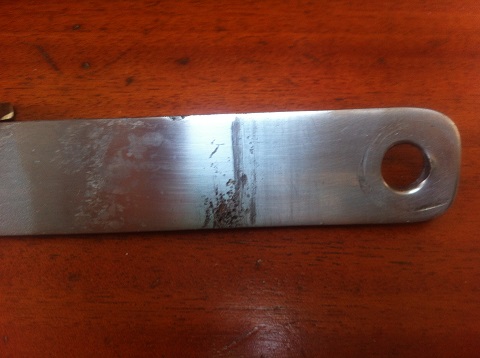 the chainplates had to be replaced. Who knew how long they would last in
such deteriorated conditions. I used the same 8 x 40 mm SS bar (the original was 6 x 35mm).
Here is an example of
the chainplates had to be replaced. Who knew how long they would last in
such deteriorated conditions. I used the same 8 x 40 mm SS bar (the original was 6 x 35mm).
Here is an example of 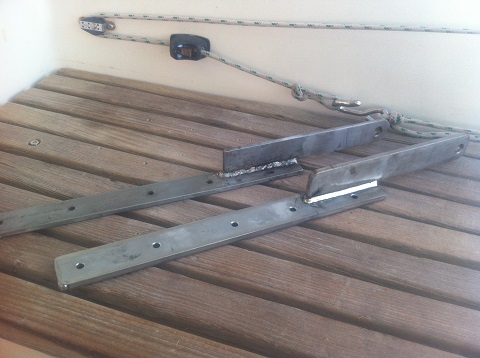 an old and a new chainplate before polishing, which took
me half a day. This is why it costs a fortune at a workshop.
an old and a new chainplate before polishing, which took
me half a day. This is why it costs a fortune at a workshop.
May 2023. Auckland. New rigging, new boom, boom vang, chainplates, conduits, steps, other mast repairs
I was told that a rigging would last about 10 years. 15 have passed. It was time to replace it. My boom potentially could have been repaired but the price would be compared with a new one. The new Selden boom was in stock in Auckland. It has a reefing system built in. I also purchased a new rigid Selden boom kicker.
When the mast was unstepped for some miscellaneous work such as replacing sheaves and installing conduits to stop the banging sound of wires inside the mast when rolling. I riveted two 35mm conduits inside the mast. Of course, I replaced the wires.
I asked a local rigger in Gulf Harbour Marina, Rob, to inspect the chainplates on the mast. Initially, he said that they were probably ok. Later he changed his mind and for good. We found quite bad corrosion under them. The new chainplates were built and some measures were done to secure them reliably to the mast.
The rigging shop patched a place for the spinnaker pole attachment with a cut profile from a larger mast. It was badly corroded.
I asked Rob to install two foldable plastic steps 1.2 m down from the top of the mast to make any job up there easier.
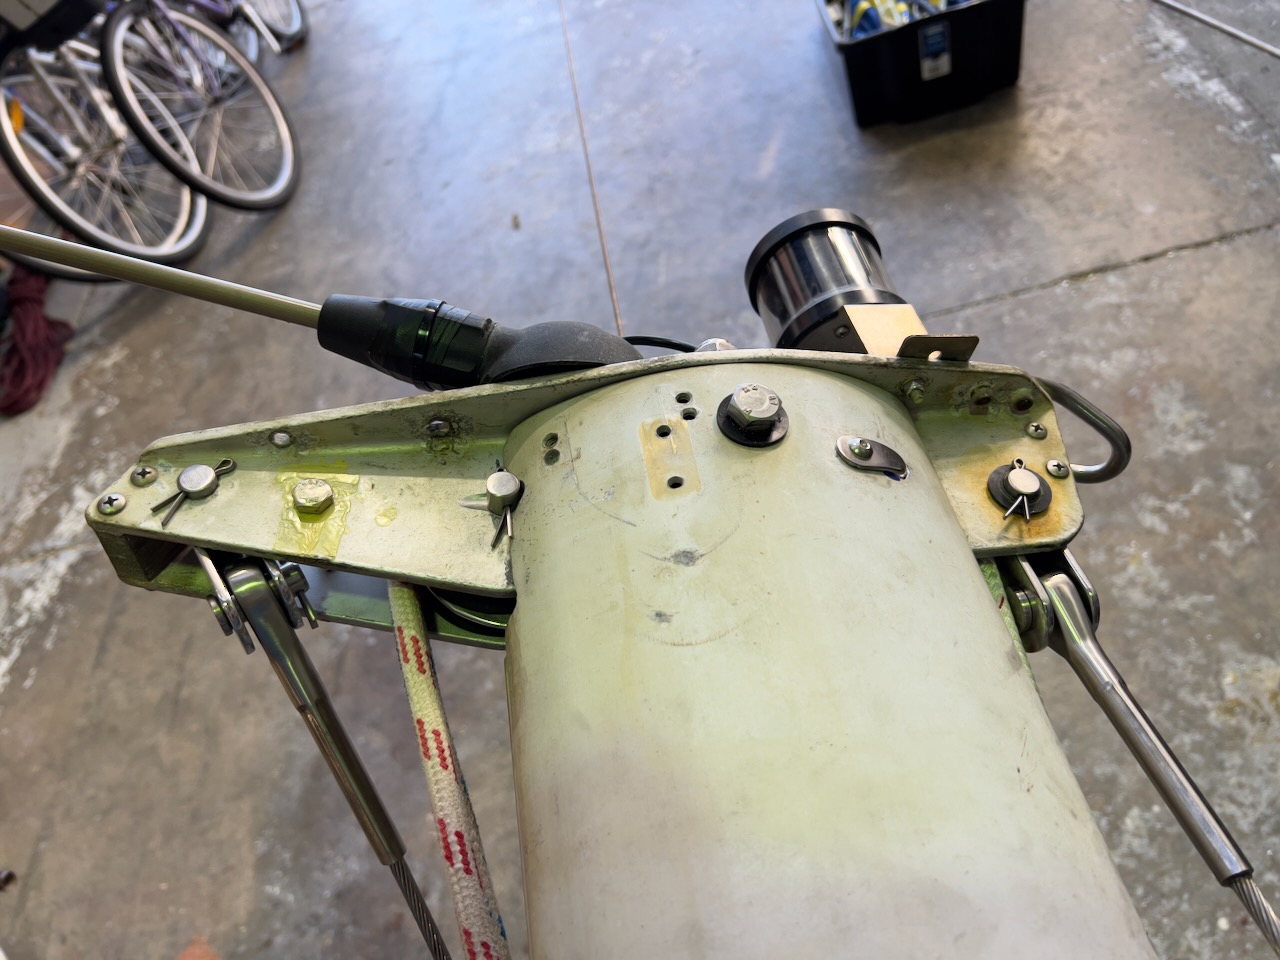
An improvement was made in top sheaves. Now it will be possible to replace them without unstepping the mast.
A new swivel of cunningham was made the last moment as Rob found that the old one cracked.
There were other minor repairs here and there.
We were finally able to remove the bottom sheave assembly with a help of two torches and sledge hammers! Unfortunately, hammering caused a couple of small cracks, which were welded later. Lanolin was used on the sheave assembly to prevent such corrosion in a future.
A standing rigging was replaced with 6mm wire. I had to order 12 HI-MOD swag-less fitting cones for it as the original cones were imperial sizes and felt lose on the metric wire. It took over a week to deliver from the US. The total rigging bill was over six grand but still cheaper than buying a new mast.